Introduction to Ultrasonic Sensor and Arduino
In this blog post, we will dive deep into the fascinating realm of ultrasonic sensor paired with Arduino boards. Get ready to explore the components needed, circuit diagrams, code writing, testing procedures, and discover a multitude of applications that make this duo a powerhouse in the realm of electronics. We also use an LCD 16×2 Display to show the distance.
An ultrasonic sensor is used to measure the distance to an object using sound waves. It provides measurements of the time that takes the sound to fling something and return it to the sensor. Read More
It works on sound wave frequency like sonar. The ultrasonic sensor also cannot detect some objects.
HC-SR04 ultrasonic can measure a range of 2 cm to 400 cm (4 m).
This sensor has 2 openings on its front. One is the transmitter which transmits ultrasonic waves like a speaker and the other is a receiver that receives them like a microphone.
Components List
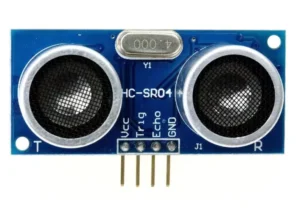
- Ultrasonic Sensor (HC-SR04)
- Arduino Uno
- Jumper Wires
- LCD Display 16×2
Pin Connections
| Ultrasonic Pins | Arduino Pins |
|---|---|
| 5v or Vin | 5V |
| GND | GND |
| Trigger | 9 |
| Echo | 8 |
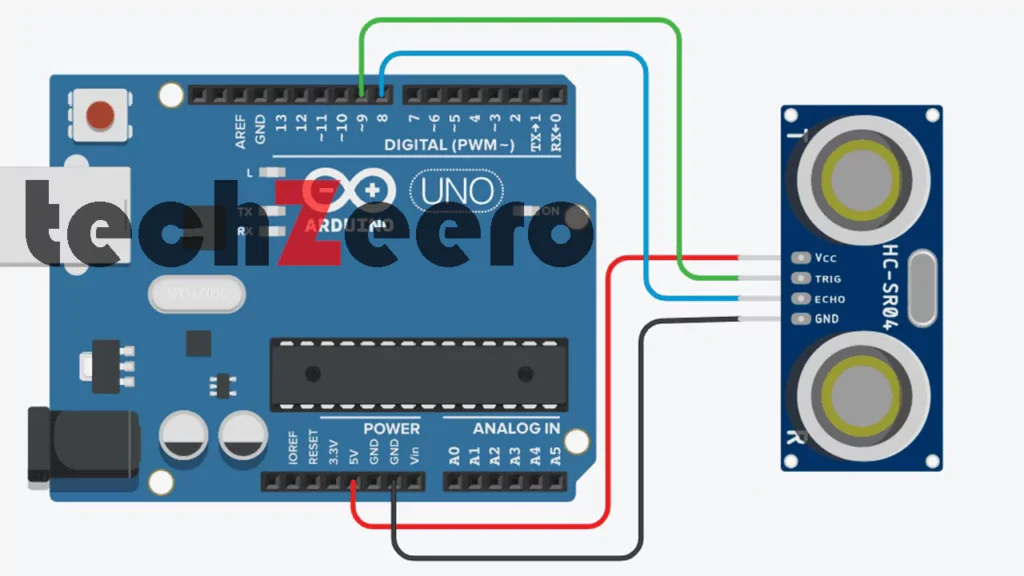
Circuit Diagram for Ultrasonic Sensor With Arduino
When setting up an ultrasonic sensor with Arduino, the circuit diagram plays a crucial role in ensuring proper connections. The diagram clearly illustrates how to connect the ultrasonic sensor pins to the Arduino board, enabling accurate distance measurements.
Typically, the HC-SR04 ultrasonic sensor requires four connections: VCC to 5V on Arduino, GND to GND on Arduino, Trig pin to a digital pin (e.g., 9), and Echo pin to another digital pin (e.g., 8). Following this layout is essential for seamless communication between the components.
Code For Ultrasonic Sensor with Arduino
Now that we have our components set up and the circuit diagram ready, it’s time to dive into writing the code for our Arduino with ultrasonic sensor project.
Open your Arduino IDE and create a new sketch. Begin by including the necessary libraries for both the ultrasonic sensor and Arduino board.
Next, define the pins where you’ve connected your sensor to the Arduino board. This will allow proper communication between the two.
Write a function to calculate distance based on the measurements from the ultrasonic sensor. Ensure it is accurate and precise in its calculations.
Implement logic that triggers actions based on specific distance thresholds detected by the ultrasonic sensor. This could be anything from turning on an LED to activating a buzzer.
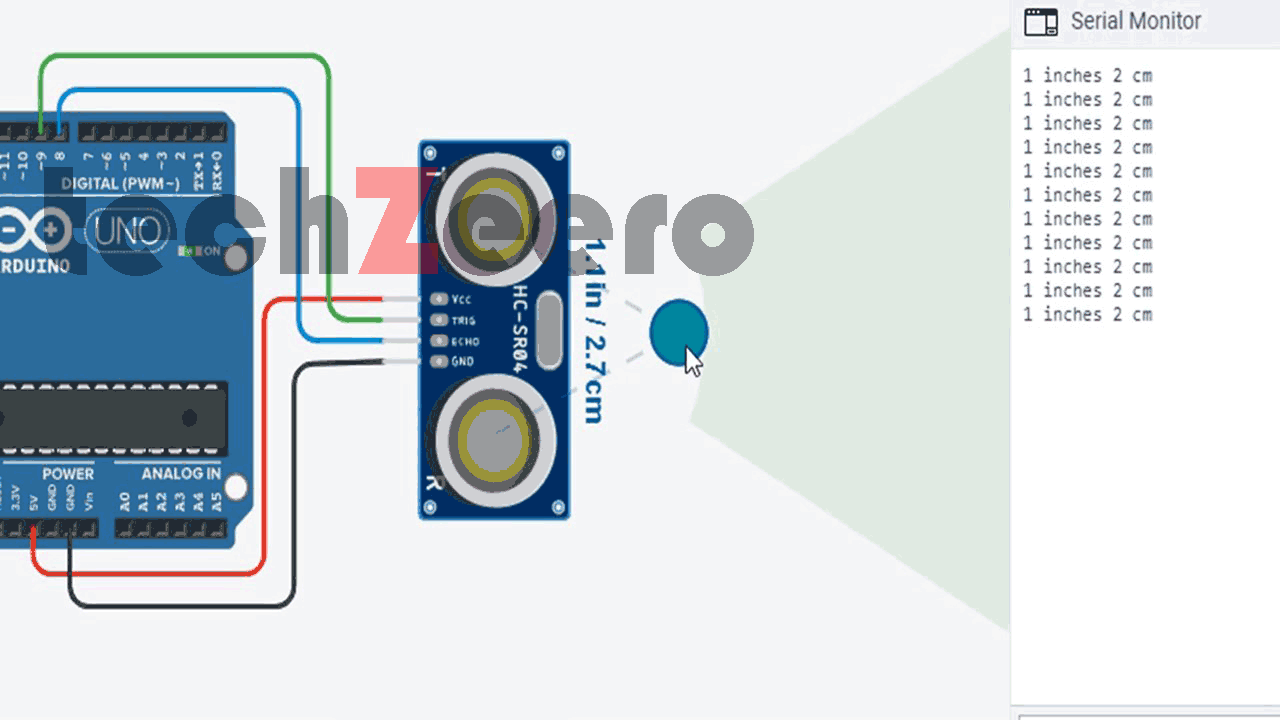
Output
Once the code is uploaded to your Arduino board and everything is properly connected, it’s time to see the results of your hard work. The ultrasonic sensor will start detecting objects within its range, sending out high-frequency sound waves and measuring the time it takes for them to bounce back.
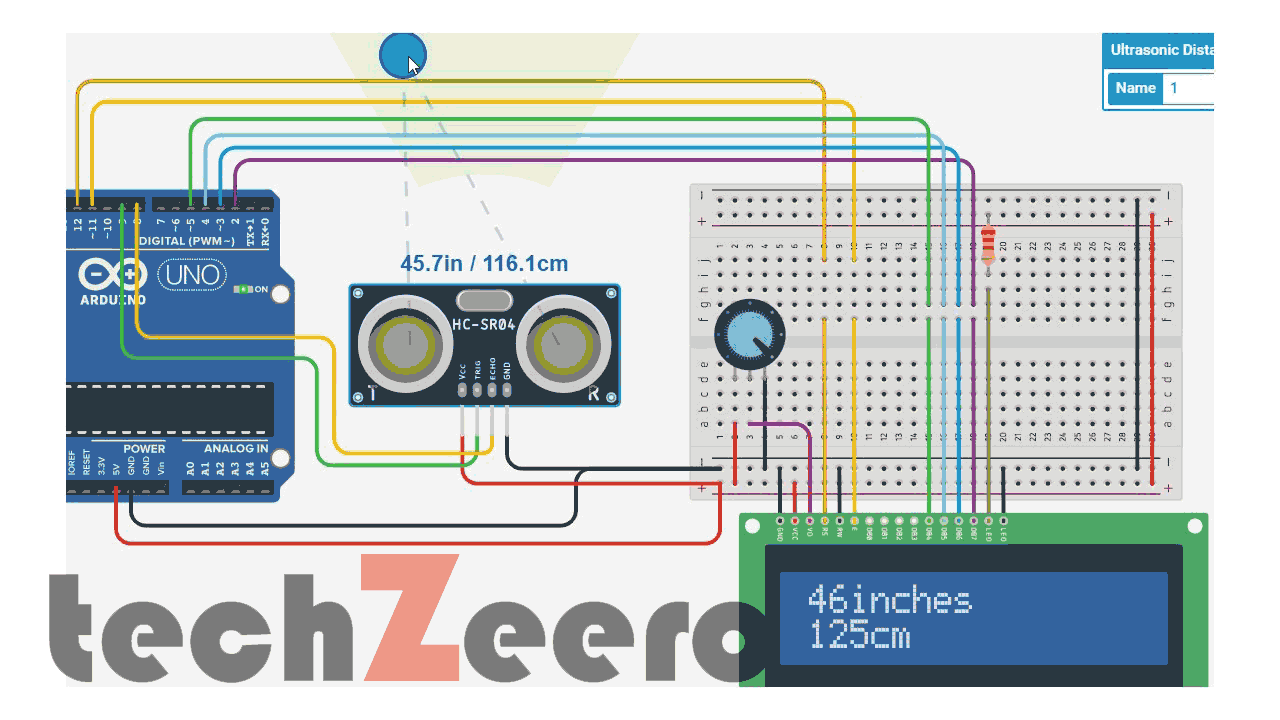
Ultrasonic Sensor and LCD 16×2 with Arduino
Are you looking to enhance your Arduino project with real-time data display? The combination of an ultrasonic sensor and an LCD 16×2 screen can take your creations to the next level. By integrating these components, you can not only detect distances accurately but also visualize the results on a clear and concise display.
The circuit diagram for connecting an ultrasonic sensor and LCD 16×2 with Arduino is straightforward yet powerful. With the right connections and code, you’ll be able to see distance measurements in real-time on the LCD screen.
Read More about LCD 16×2:
Pin Connections of LCD 16×2 with Arduino
| Pin No. | LCD Pins | Arduino Pins |
|---|---|---|
| 1 | VSS/GND | GND |
| 2 | VDD/VCC | 5v |
| 3 | V0 | Potentiometer Vout |
| 4 | RS | 12 |
| 5 | RW | GND |
| 6 | E | 11 |
| 7-10 | D0-D3 | No connection |
| 11 | D4 | 5 |
| 12 | D5 | 4 |
| 13 | D6 | 3 |
| 14 | D7 | 2 |
| 15 | A/LED+ | 5v |
| 16 | K/LED- | GND |
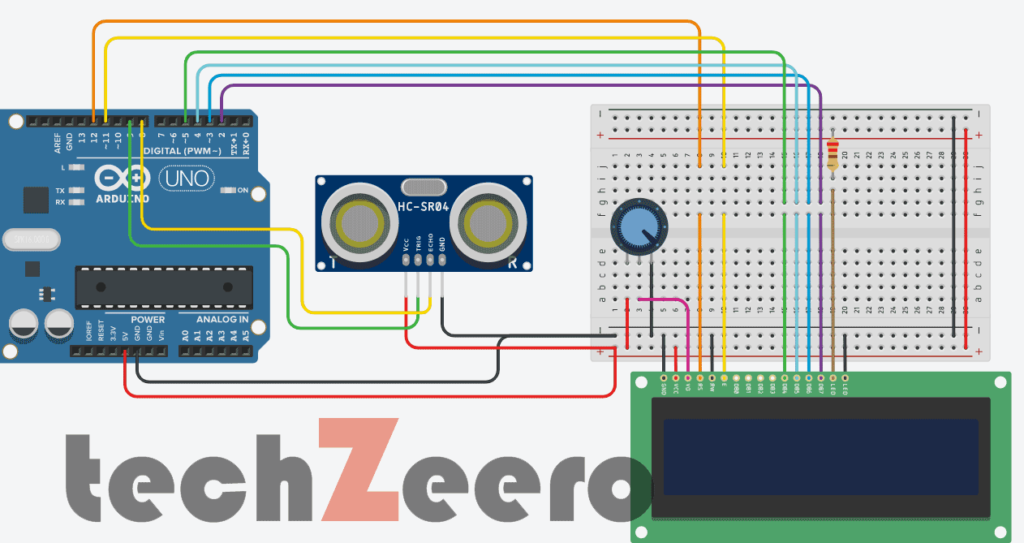
Circuit Diagram of Ultrasonic Sensor and LCD
When it comes to combining an ultrasonic sensor with an LCD display using Arduino, the circuit diagram is crucial. The connection between these components allows for real-time distance measurements to be displayed on the screen effortlessly.
In the setup, ensure that the VCC pin of both the ultrasonic sensor and LCD display are connected to 5V on the Arduino board. The GND pins should be connected to ground, establishing a common reference point for proper functioning.
The Trig and Echo pins of the ultrasonic sensor should be linked to digital pins on the Arduino for transmitting and receiving signals. Similarly, connect SDA and SCL pins from the LCD display module to corresponding analog pins on your Arduino board for data communication.
Code for Ultrasonic Sensor and LCD
Now, let’s dive into the exciting part – writing the code for connecting an ultrasonic sensor and an LCD display with Arduino. The code will allow us to measure distances using the sensor and display them on the screen in real-time.
To start, we need to include the necessary libraries for both the ultrasonic sensor and LCD display in our Arduino sketch. This ensures that we can utilize their functions seamlessly within our code.
Next, we initialize the pins for both components to establish communication between the Arduino board, ultrasonic sensor, and LCD display. This step is crucial for proper data transmission and display output.
Moving on, we write the main loop where we read distance measurements from the ultrasonic sensor continuously. These measurements are then displayed on the LCD screen so that users can easily visualize them without any hassle.
Output
Once the ultrasonic sensor is successfully connected to the board and the code is uploaded, it’s time to see the output in action.
The sensor will start emitting ultrasonic waves and measuring the distance between itself and any object in its range. As an object comes closer, you’ll notice changes in readings displayed on the LCD display.
Applications and Benefits of Using an Ultrasonic Sensor with Arduino
One of the key benefits of using an ultrasonic sensor with Arduino is its versatility. This powerful combination can be applied in various fields such as robotics, automotive, healthcare, and even home automation.
- In robotics, ultrasonic sensors paired with Arduino can enable robots to detect obstacles and navigate their surroundings autonomously. This technology has revolutionized industries by enhancing efficiency and safety measures.
- Moreover, in the field of healthcare, these sensors play a crucial role in medical imaging systems for accurate measurements and diagnoses. The precise distance measuring capability of ultrasonic sensors ensures reliability in critical applications.
- Beyond that, combining an ultrasonic sensor with Arduino in home automation projects allows for smart devices to sense motion or proximity effectively. This integration enhances convenience and energy efficiency within households.
The applications are vast and continue to evolve as technology advances further. Ultrasonic sensors with Arduino are undoubtedly a game-changer across multiple industries due to their reliability and adaptability.